Table of Contents
5 IKARUS mail.security
5.1 Domains
5.2 Ingoing
5.2.1 Routes
5.2.2 Settings
5.2.2.1 General
5.2.2.2 Virus filter
5.2.2.3 Attachment filter
5.2.2.4 HTML filter
5.2.2.5 Spam filter
5.2.2.6 Spam rules
5.2.2.7 Exceptions for Greylisting
5.3 Outgoing
5.4 Mailboxes
5.5 Search
5.6 IKARUS mail.security – S/MIME
5.7 IKARUS mail.security – Encryption
5.8 O365
5.9 Further settings
1 Dashboard
The dashboard is the start page in the IKARUS portal and appears automatically after login. It offers a quick overview over the whole account (email address, last login etc.) and over all activated IKARUS services.
The statistic shows a summary of the following products:
- IKARUS mail.security (with/without ATP – Advanced Threat Protection)
- IKARUS web.security
- IKARUS wifi.security

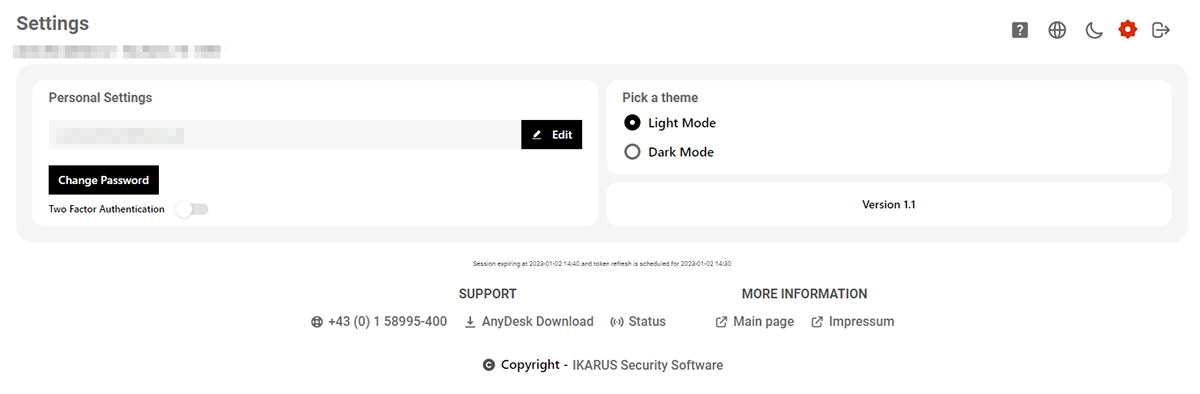
2 Settings
The settings can be opened at the top right by clicking on the cogwheel icon.
In the settings, you can change the password and the design as well as activate the two-factor authentication for your own account.
3 Footer
At the bottom of each page, you will find the IKARUS support information and links to the remote maintenance applications.

4 Organisation
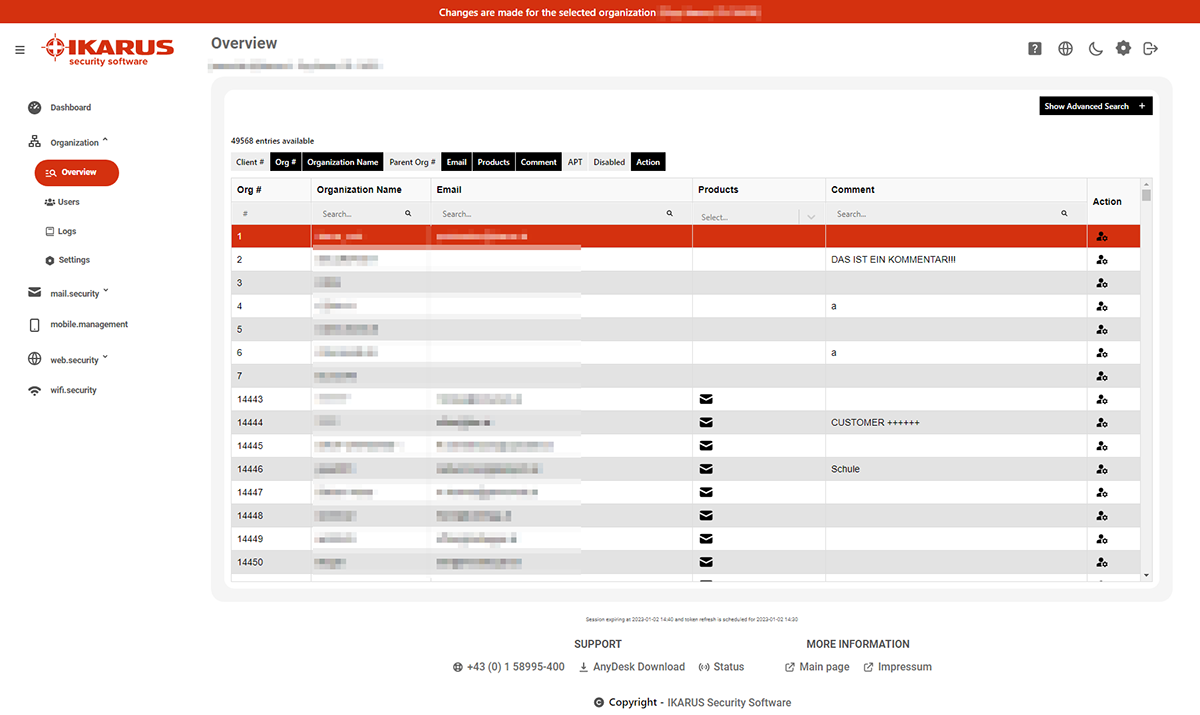
4.1 Overview
In the overview, you can see all subordinate instances that belong to your administration. To manage an organisation, switch to the respective organisation in the “Action” column.
All actions remain assigned to the user you are signed in with.
4.2 Users
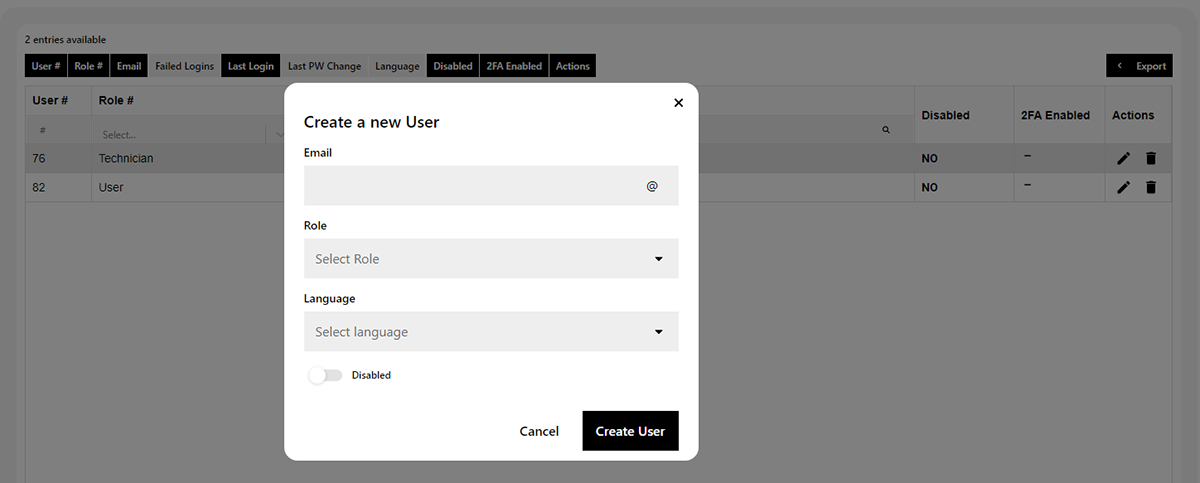
Under the menu item users, you can see all accounts of the currently selected instance. You can edit them in the “Action” column on the right.
Use the “+” button to add new users by entering the email-address and choosing the suitable role.

The following roles are possible:
- Administrator: Administrative user for own organisation as well as with all rights for all assigned organisations
- Technician: Administrative user for own organisation exclusive user management as well as with all rights for all assigned organisations
- Client Technician: Administrative user with all rights for all assigned organisations
- Read Only Technician: Read-only users for own organisation as well as for all assigned organisations
- User: Administrative user for a specific organisation
- Read Only User: Read-only users for a specific organisation
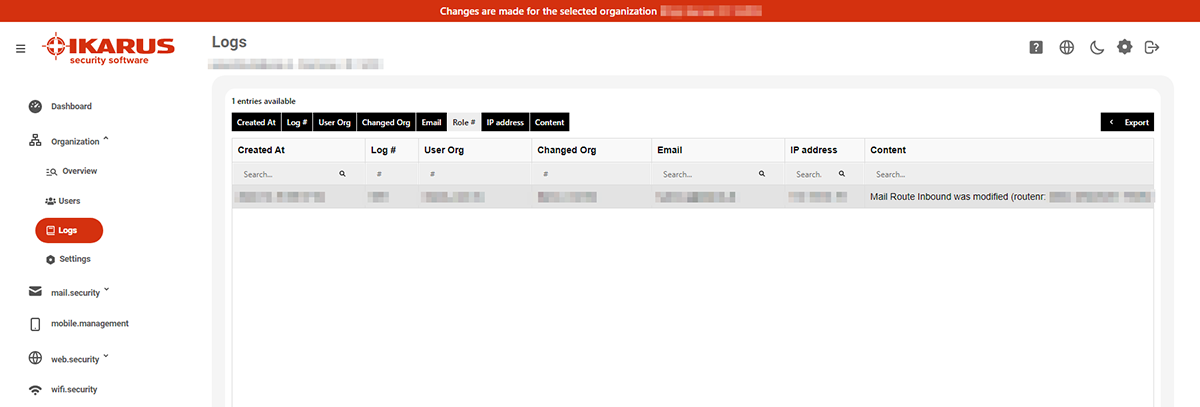
4.3 Logs
Here you will find the logs of all organisational changes. They also show from which account these changes were made.
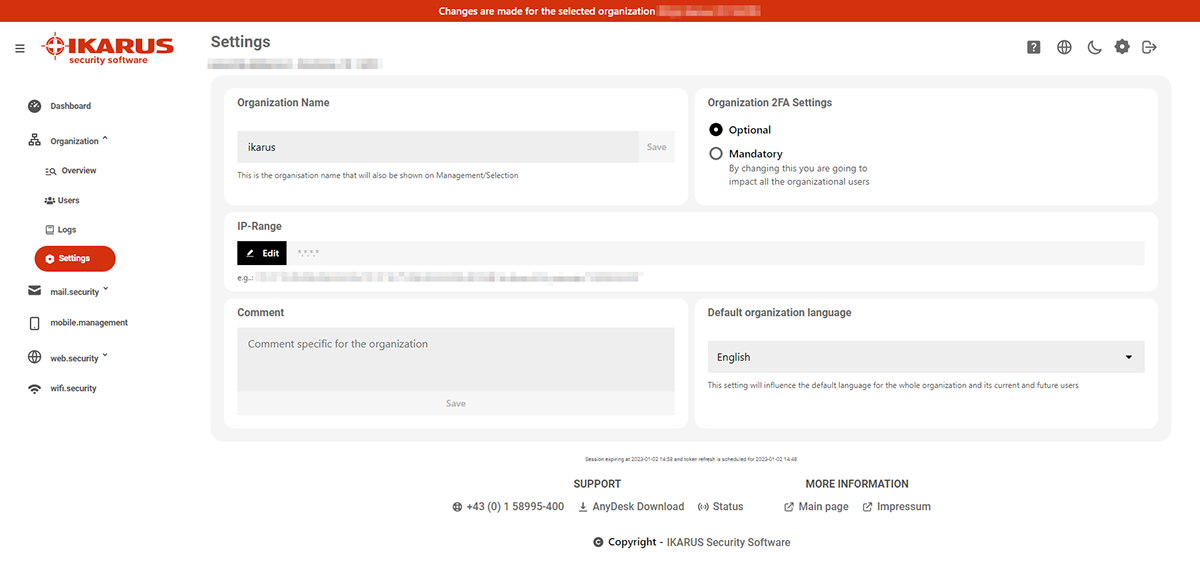
4.4 Management/Settings
This is where you can make organisation-wide settings.
5 IKARUS mail.security
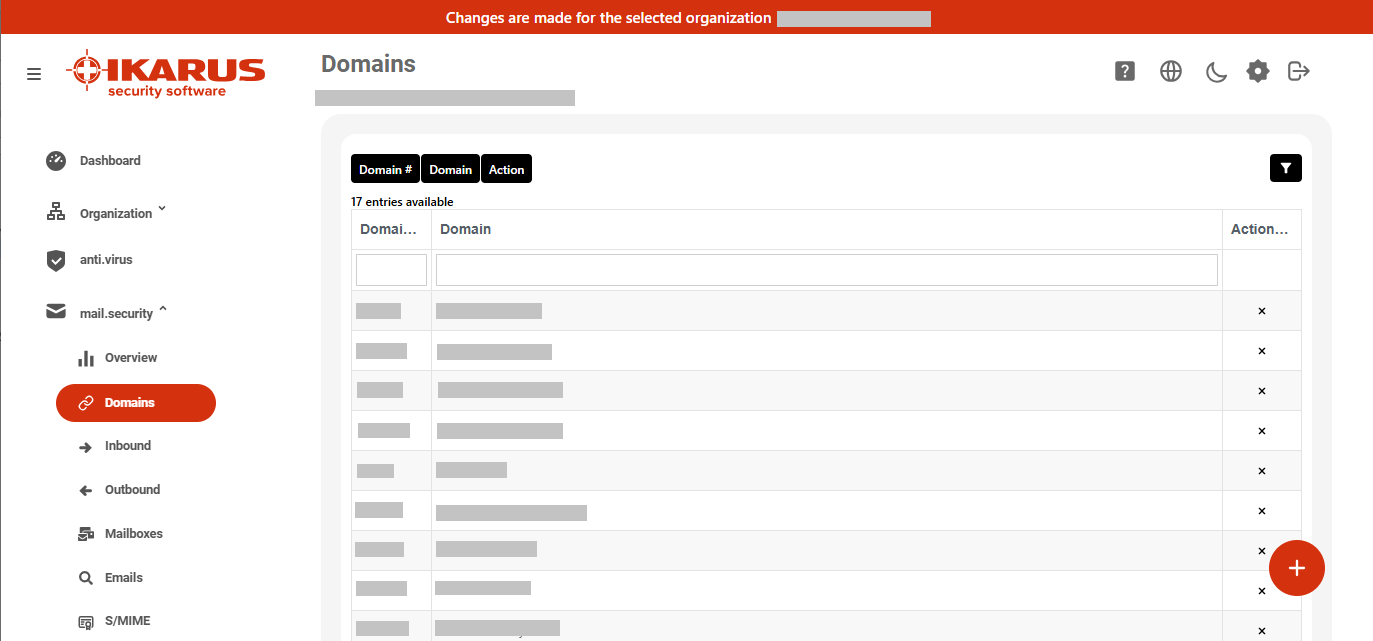
5.1 Domains
Manage your domains for IKARUS mail.security here:
- Click the red plus button at the bottom right to add a new domain.
- Click the X under Actions to delete a domain.
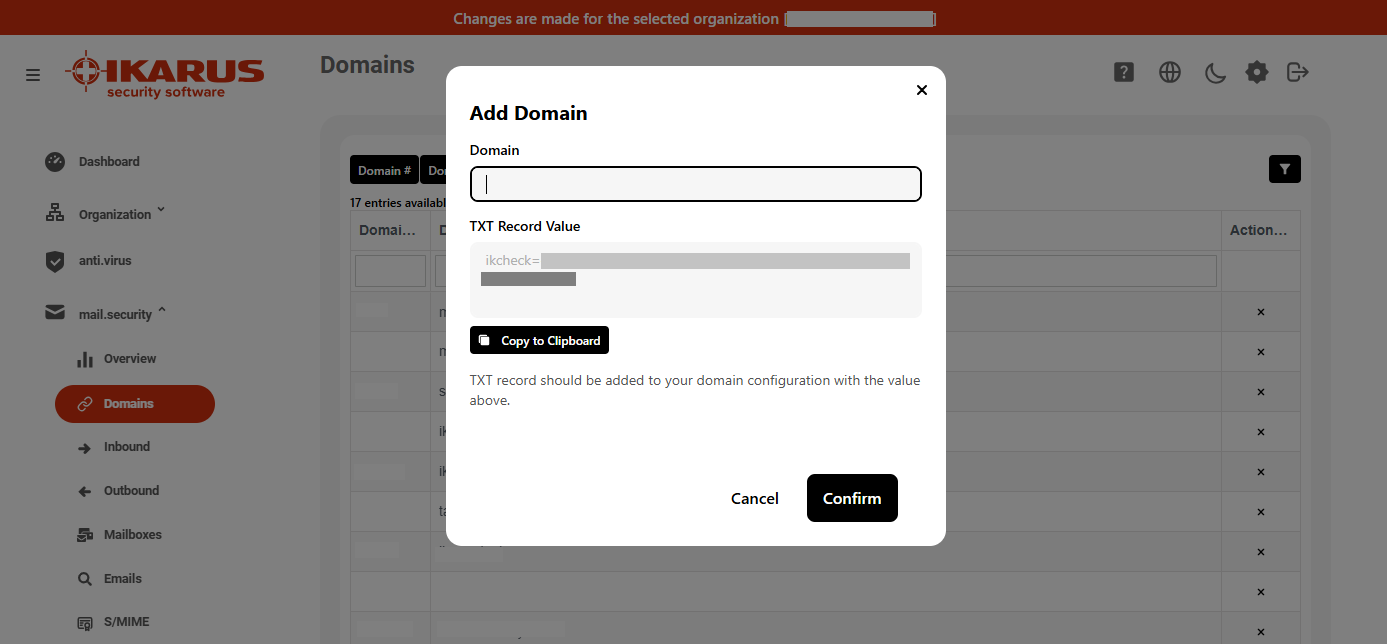
Adding a domain: When adding a domain in the IKARUS Portal, you will be shown an organization-specific string under Value of the TXT entry. Add this string as a TXT record in your DNS configuration. This string is used to associate the domain with your organization and is identical for all domains.
Once the DNS change takes effect, you can create new incoming and outgoing routes for the approved domains in the IKARUS Portal or add them to existing routes.
Deleting a domain: Before deleting a domain, it must be removed from all existing routes. Otherwise, an error message will be displayed during the deletion process.
5.2 Ingoing
5.2.1 Routes
Apply for new routes or edit existing routes by clicking on the red plus at the bottom right. Click on “Settings” to access the settings for the respective set.

5.2.2 Settings
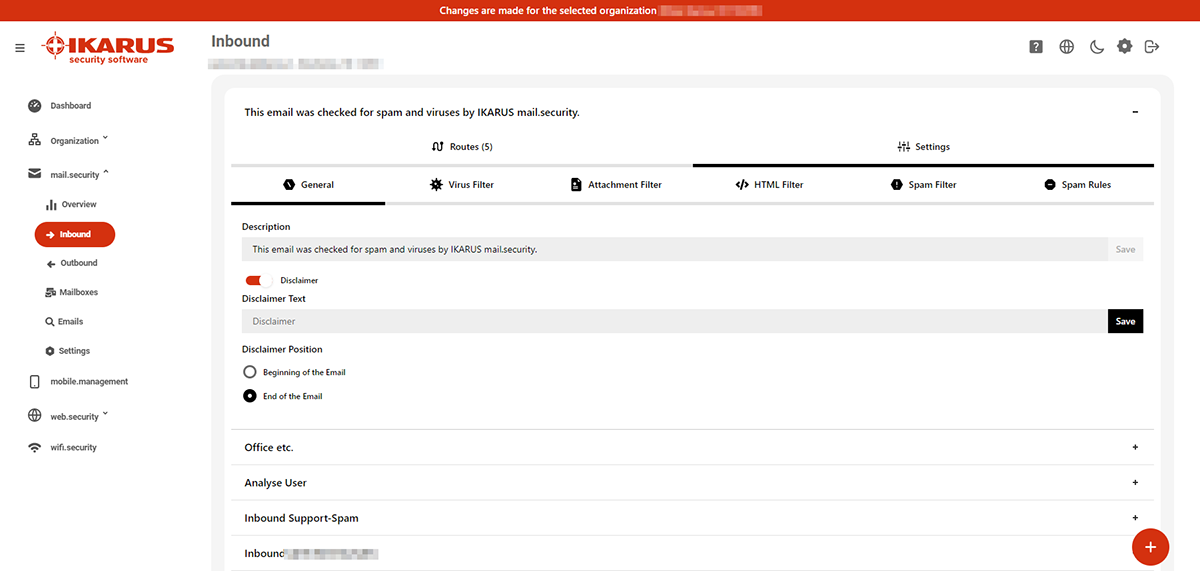
5.2.2.1 General
Configure a disclaimer by setting the option to enabled. The disclaimer is added to all transmitted e-mails.
5.2.2.2 Virus filter
Define which actions should be taken in case of a virus detection and how to deal with password-protected archives.

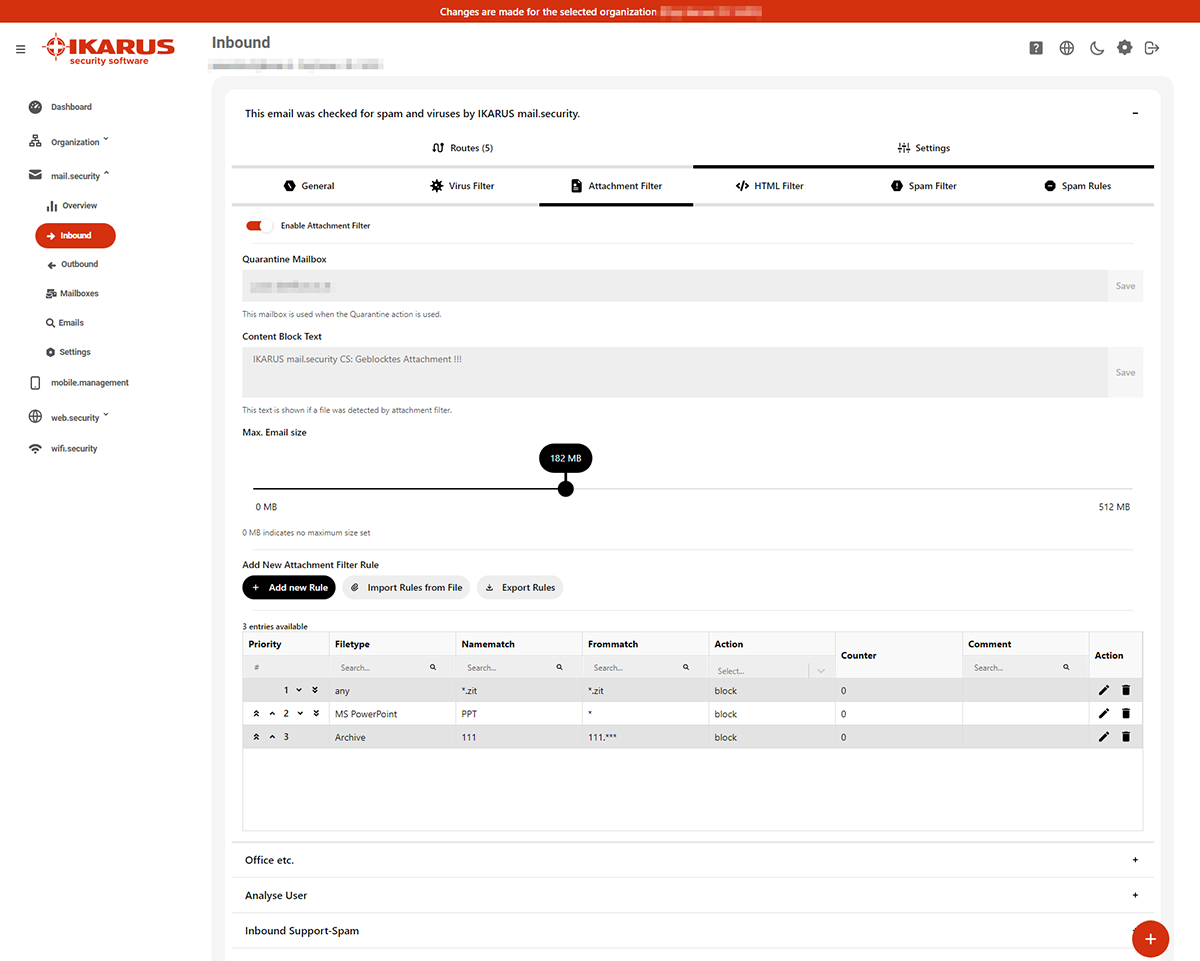
5.2.2.3 Attachment filter
Block certain file types, also based on the sender. If this is to apply to all senders, enter “*” as a placeholder.
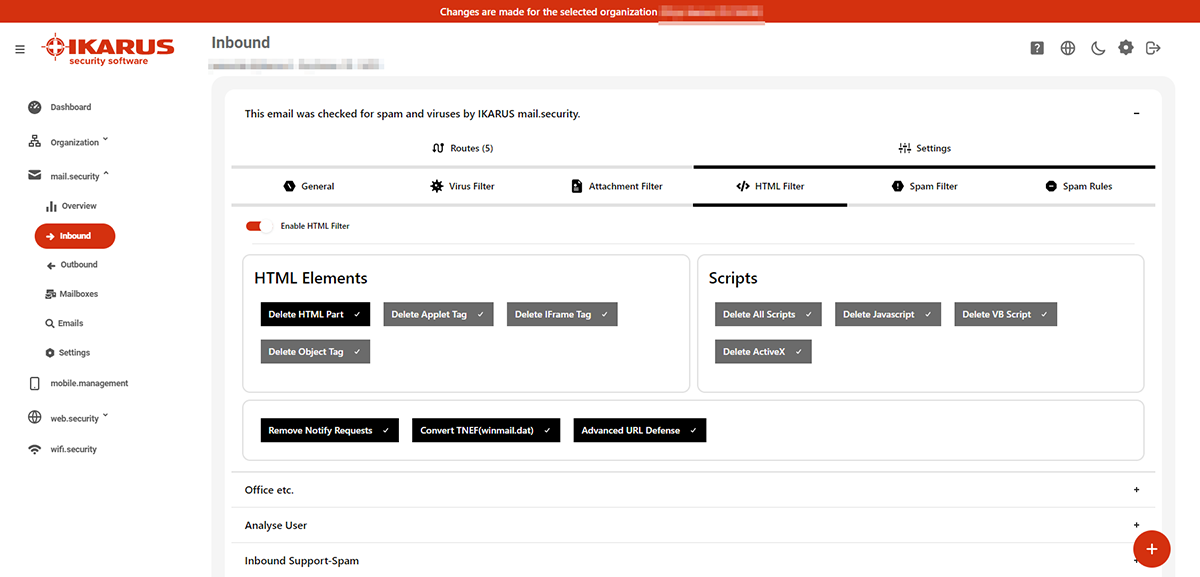
5.2.2.4 HTML filter
The HTML filters build on each other. The auto conversion turns a pure HTML e-mail into an e-mail consisting of HTML and text.
“Remove HTML”: Deletes any HTML part from the email. To remove only certain parts, distinguish between tags that should be deleted and scripts. It is also possible to remove all scripts.
“Remove Notify Requests” removes read and receipt confirmations from emails.
“Convert TNEF” converts winmail.dat files back to standard emails.
“Advanced URL Defense” scans links not only when an email is received, but again each time the URL is clicked. This means that even delayed attacks are detected and blocked.
5.2.2.5 Spam filter
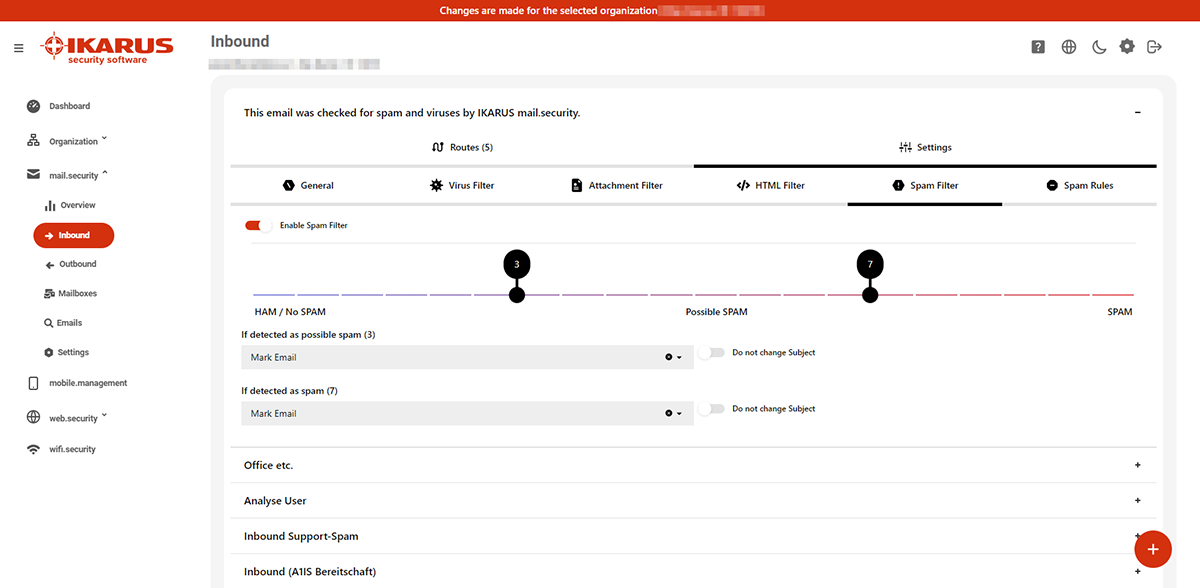
Each email that is checked by IKARUS goes through various filters and is evaluated according to different criteria (e.g. SPF, dynamic word filters, rules…). The more plus points an email collects, the higher the probability that it is “real” spam. You can use the slider to determine how sensitively IKARUS mail.security should react.
The sliders shows the limit values for “possible spam”. Below you can determine how IKARUS mail.security should deal with “spam” and “possible spam”.
The example in the screenshot shows the following settings:
- 0 points to 3 points: ok – no spam, no marking of the emails
- 3 points to 7 points: possible spam
- 7 points to 10 points: spam
5.2.2.6 Spam rules
Define rules to categorise emails, for example when the sender is on several blacklists but the recipient still wants to receive these emails.
- Email section: Define the section the filter should apply to
- Sender: The actual sender of the email that must not necessarily correspond to the sender displayed in the e-mail programme.
- Recipient: Shows the address to which the email is sent. Allows to choose select a single address to be excluded from the spam filter.
- Subject: Identify a certain text that is part of the subject.
- Text: Identify a certain text sequence that can be found in the main part of the email.
- Content: Shows the content of the email. It identifies the string used to perform a search for sender, recipient, subject or text. Note that the search is only performed for the string, without taking into account what comes before or after it (e.g. searching to “count” will also including “accounting” in the search results”.
- Input: defines how to deal with the email if it was detected by the spam filter. Choose between regular email, possible spam or spam.
- Counter: Counts how many times a rule was applied since its implementation. The reset-button will reset all counters.
- Action: Rules can be deleted, edited or shifted upwards or downwards. Please note that the rules will apply from top to bottom using the first applicable rule. This means that the order of the rules is of importance.

5.2.2.7 Exceptions for Greylisting
Greylisting is an effective method for filtering spam emails, where emails from unknown senders are temporarily rejected. Unlike spam bots, legitimate mail servers typically retry sending the email after a short delay, at which point it is accepted.
To ensure that legitimate mail servers that do not perform retry attempts are not blocked, you can now define specific exceptions in the settings of IKARUS mail.security.
Greylisting exceptions can be added based on the host name or IP address in the following format:
mail.domain.com / 127.0.0.1
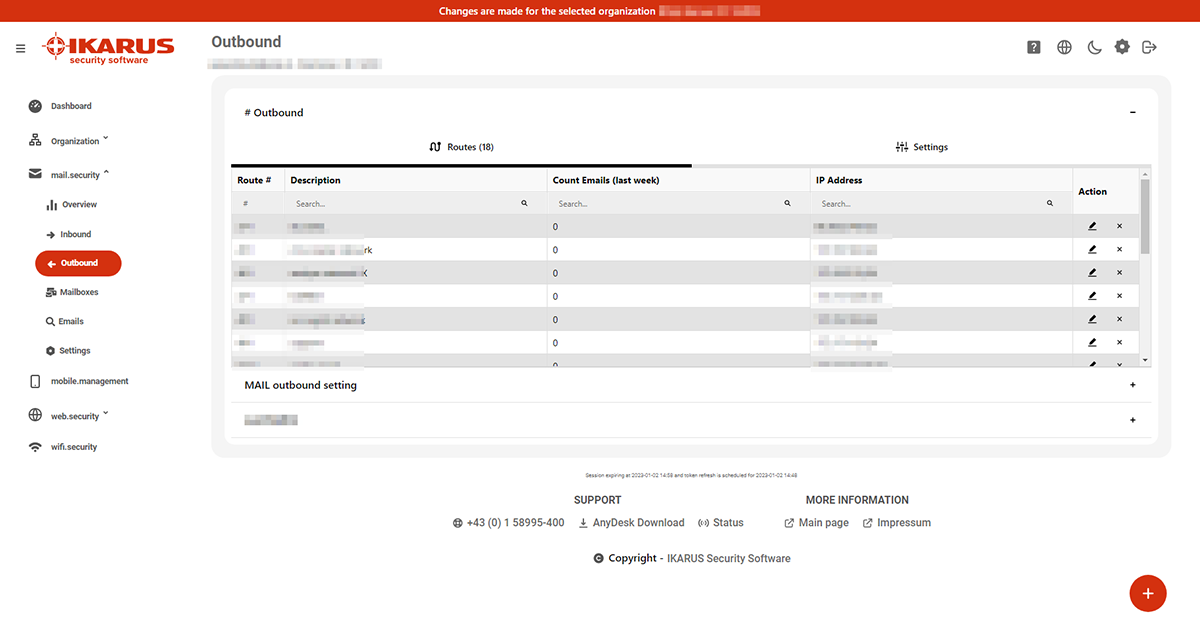
5.3 IKARUS mail.security – outgoing
The settings for outgoing routes (“Outgoing”) are identical to the settings for incoming routes described above.
Here, too, there are detailed settings for the disclaimer and the desired behaviour when a threat is found in an e-mail.
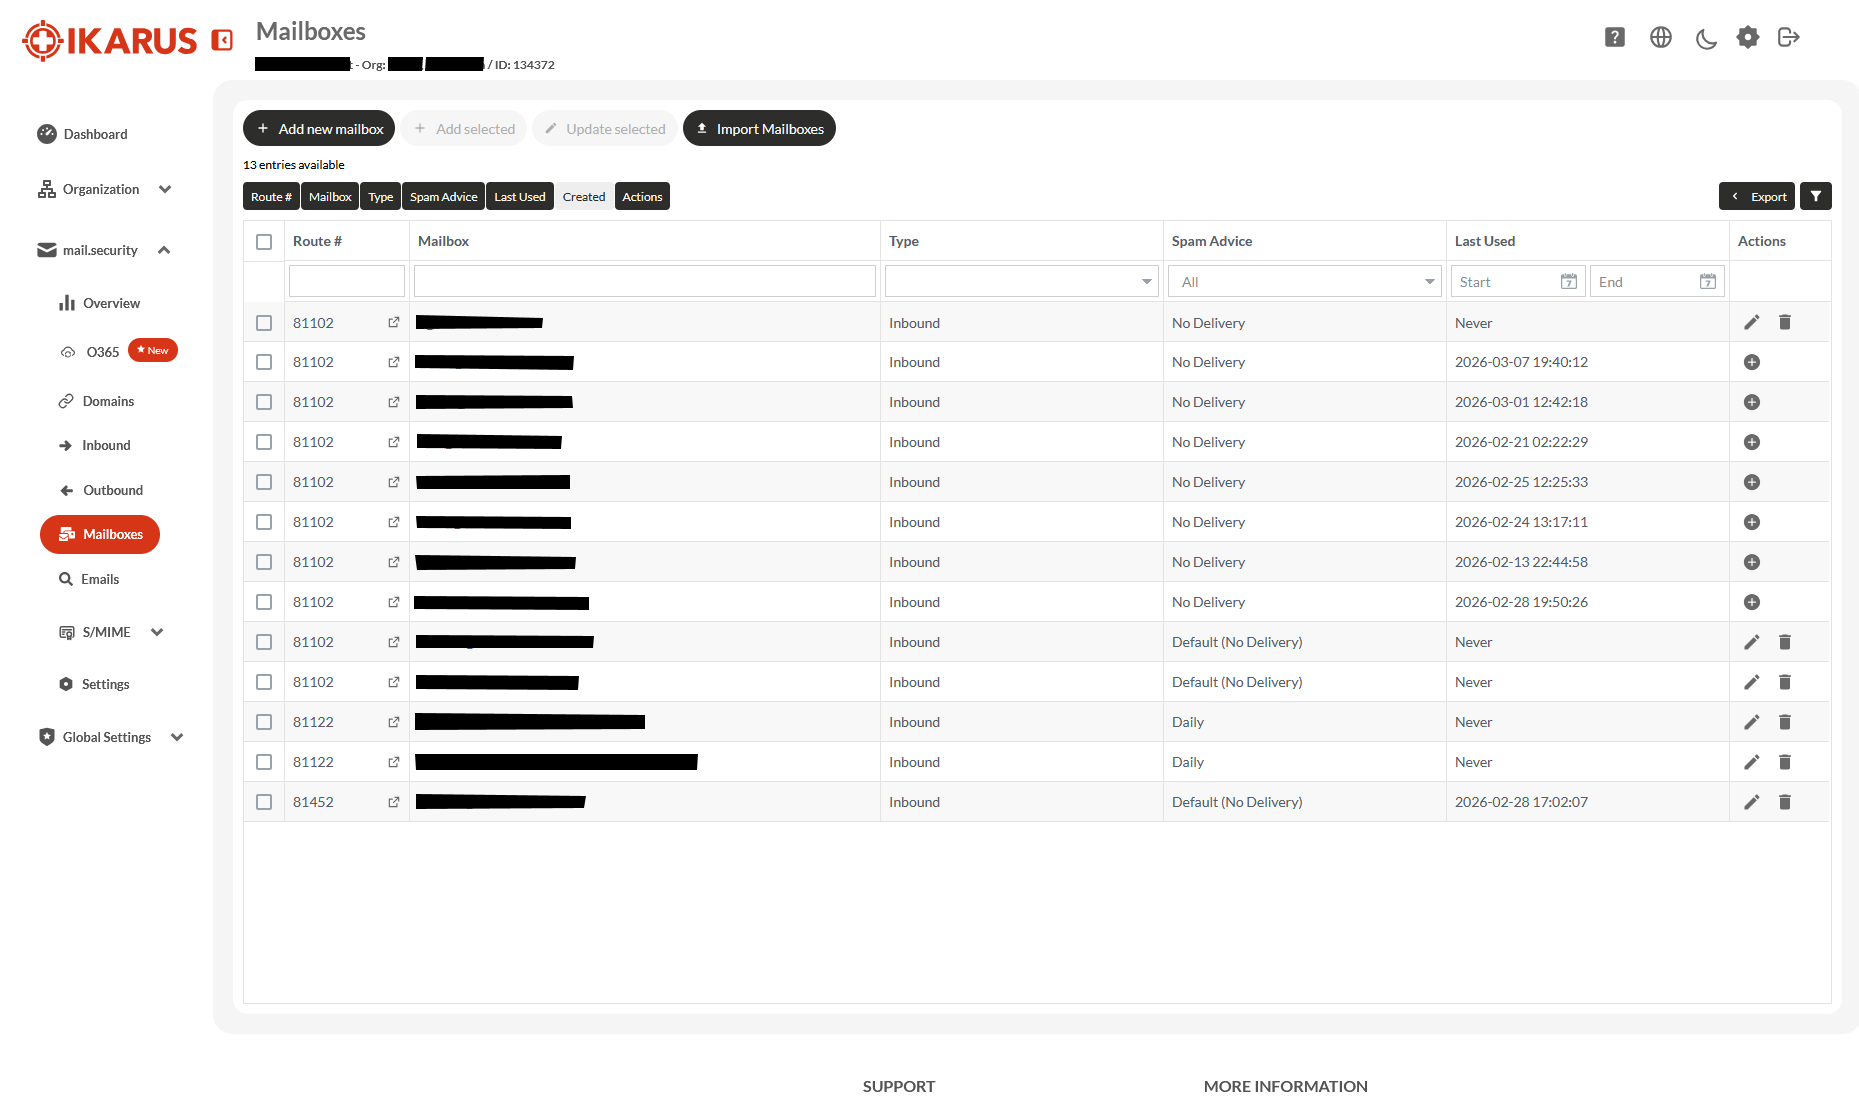
5.4 IKARUS mail.security – Mailboxes
Here you can manage all your mailboxes.
Mailboxes that were not explicitly specified but allowed via a wildcard ( *@domain.com ) can be added to an incoming route with a single click.
In addition, mailboxes can be moved between routes, and the settings for spam reports can be adjusted.
To import mailboxes, use XLSX or CSV files.
Providing a route number and spam report is optional. If not specified, the default values will be used.
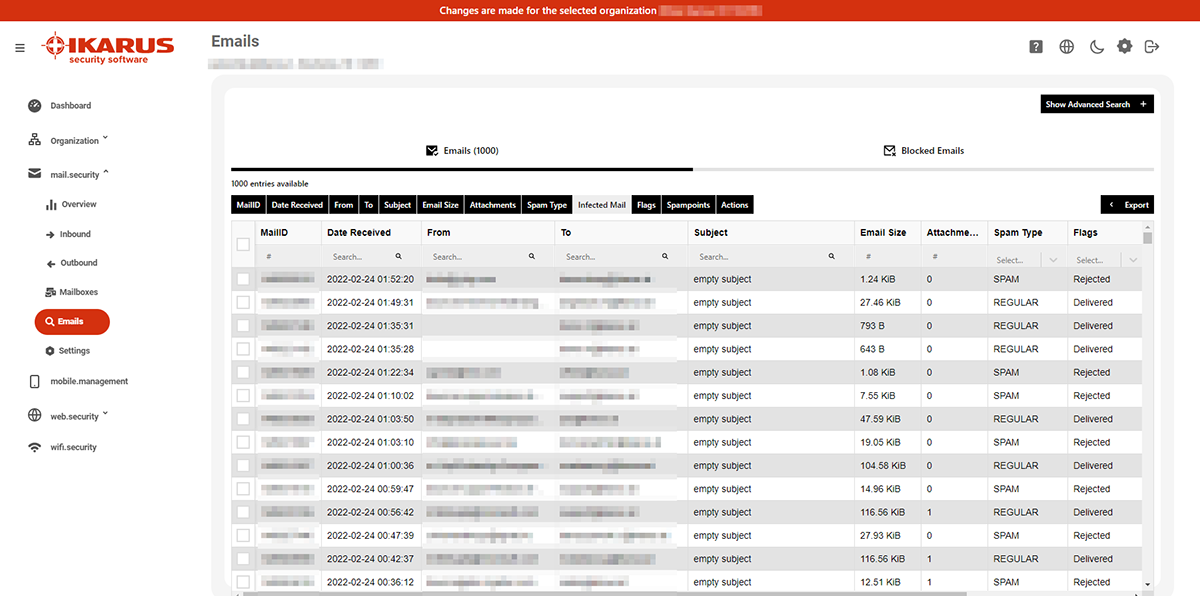
5.5 IKARUS mail.security – search
Advanced email search and the Greylist log are combined in one search. Well-known search criteria such as delivery status or infections are also included.
5.6 IKARUS mail.security – S/MIME
Under Certificates you can see the number of available IKARUS S/MIME certificates and the number of certificates currently in active use. The graphic also shows the number of mailboxes configured in IKARUS mail.security.
In the table you will find an overview of your maliboxes and your available IKARUS S/MIME licences as well as their status and allocation. The overview contains all email addresses that have been configured as a known mailbox in IKARUS mail.security in an incoming route. The list can be filtered by mailbox, domain, and S/MIME status. By clicking on the Export button, the overview can be exported as a CSV file or Excel spreadsheet.
Inactive means that no certificate has been assigned to this mailbox and therefore no signing of the outgoing e-mail takes place.
Active means that this mailbox uses one of your SMIME certificates and outgoing emails are automatically signed when sent via IKARUS mail.security.
In deactivation means that the certificate of this mailbox has been revoked. After a revocation period of maximum 14 days, the certificate is released and reappears in the list of your available certificates.
Under Actions, certificates can be requested for the respective mailbox by clicking on the + sign. Click on the upload icon to upload external certificates from third parties to manage them via IKARUS mail.security. Note: Imported certificates are used like IKARUS S/MIME certificates and thus also counted towards the IKARUS contingent.

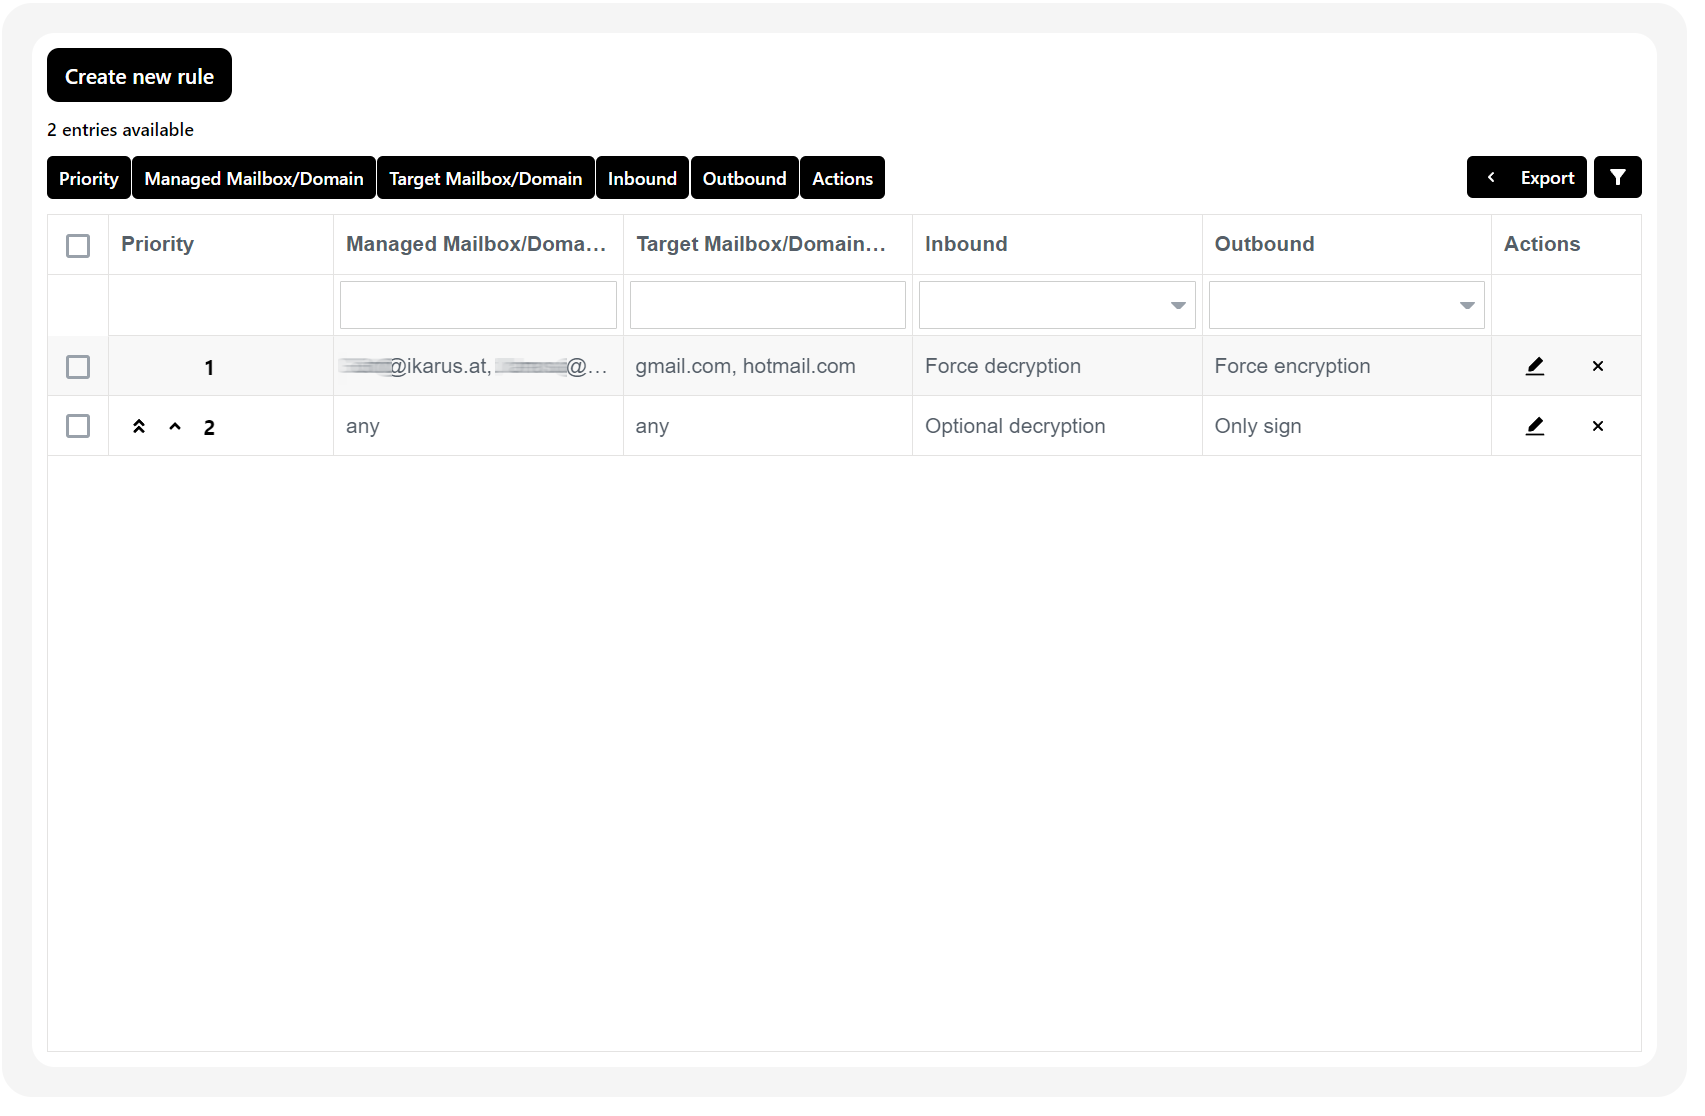
5.7 IKARUS mail.security – Encryption
The rules for encryption can be entered here
The rules are processed according to their priority and the first hit applies.
New rules require the following parameters:
- Managed mailbox/domain
- A mailbox managed by mail.security in this organization
- Max. 20 entries per rule
- Comma separated
- To apply to all “ANY”
- External mailbox/domain
- A mailbox outside this organization to which mail is sent or from which mail is received
- Max. 20 entries per rule
- Comma separated
- To apply to all “ANY”
- Incoming rule
- Not defined
- No change to the lower prioritized rules
- Do not decrypt
- Encrypted emails are accepted and delivered encrypted
- Optionally decrypt
- Encrypted emails are decrypted if possible
- DEFAULT
- Always decrypt encrypted emails
- unencrypted emails are accepted
- Encrypted emails that cannot be decrypted will display an error message
- Force decryption
- only encrypted emails are accepted
- Outbound
- Not defined
- no change to the lower prioritized rules
- Neither sign nor encrypt
- Emails are sent unsigned and unencrypted
- DEFAULT
- Sign only
- Emails are signed and sent unencrypted
- Optional encryption
- Emails are signed and encrypted where possible
- Enforce encryption
- Emails are only sent signed and encrypted
- Emails are sent unsigned and unencrypted
- Not defined
- Encrypted emails are decrypted if possible
- Not defined
Rules are added to the top of the table with priority 1
The table consists of:
- Priority
- Order in which the rules are processed
- After a hit, no further steps are taken through the table
- Exception for “Not defined”
- This can be adjusted using the arrow keys
- After a hit, no further steps are taken through the table
- Managed mailbox/domain
- Mailboxes / domains entered as a rule
- External mailbox/domain
- Mailboxes / domains entered in the rule
- Incoming
- How the incoming email should be handled
- From external mailbox to Managed
- Outgoing
- How the outgoing email should be handled
- From managed mailbox to external mailbox
- Actions
- Delete the rule
- Edit the rule
- How the outgoing email should be handled
- How the incoming email should be handled
- Order in which the rules are processed
If multiple rules are selected, you can also delete multiple rules
5.8 O365
Automatically synchronize domains, mailboxes and routes from Microsoft 365 into IKARUS mail.security. A wizard guides you through the entire process.
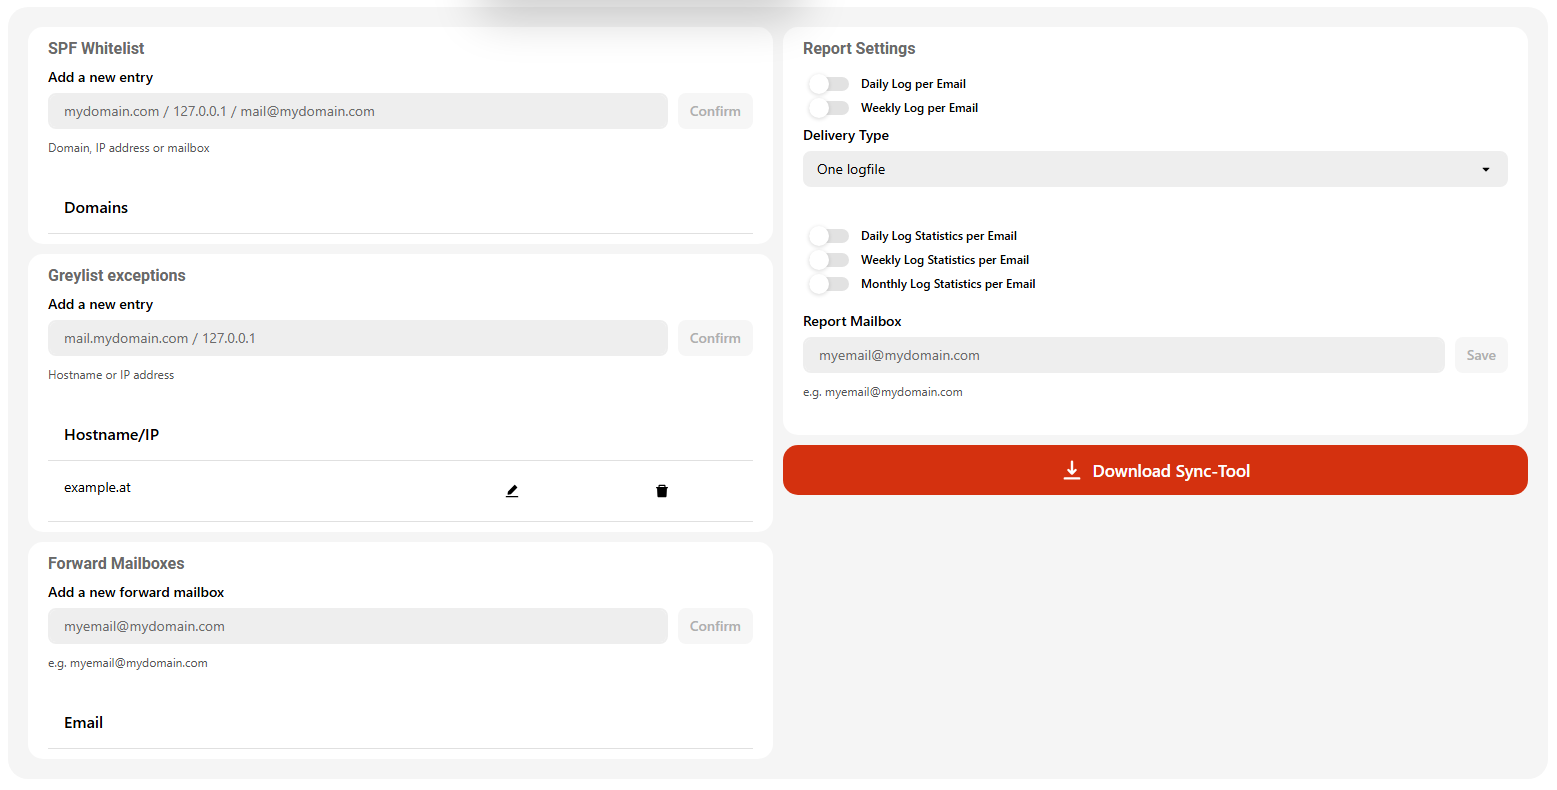
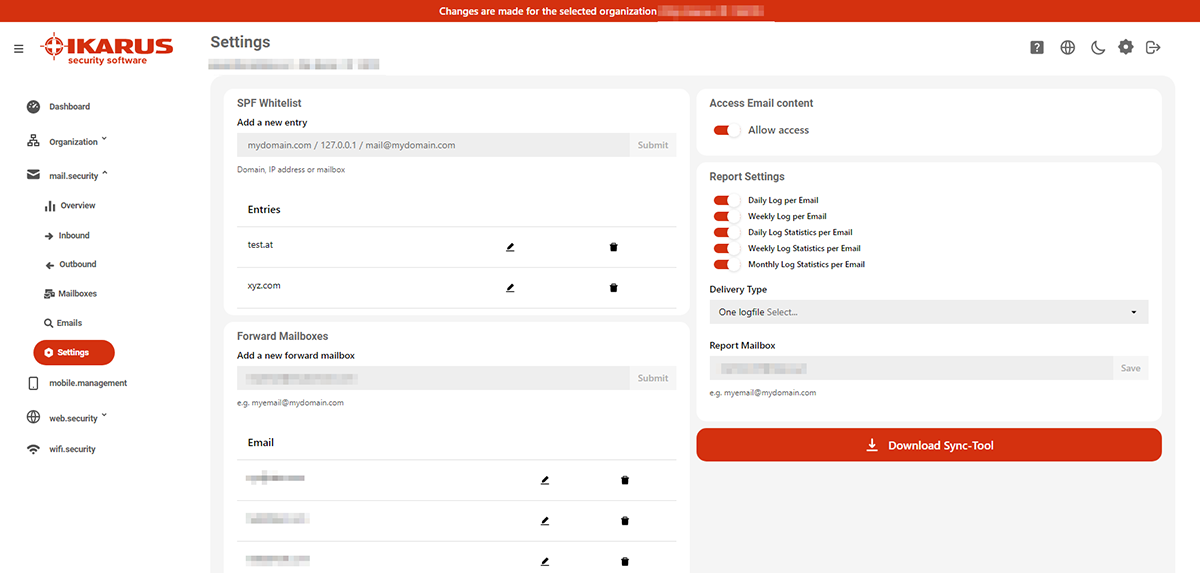
5.9 Further settings
Active a SPF whitelist or an email address for forwarding.
6 IKARUS web.security
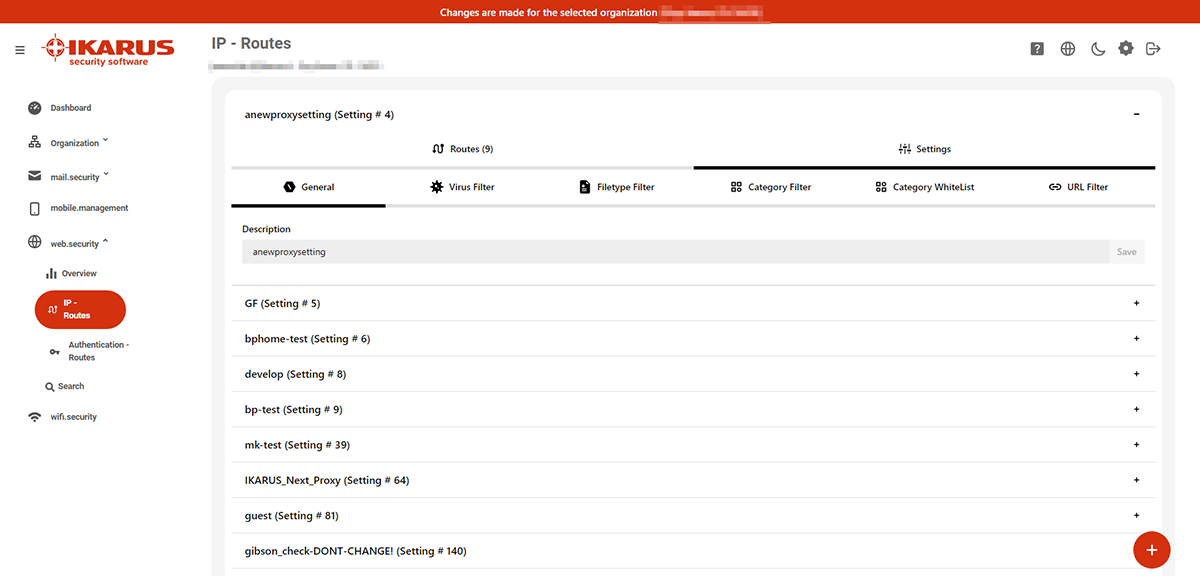
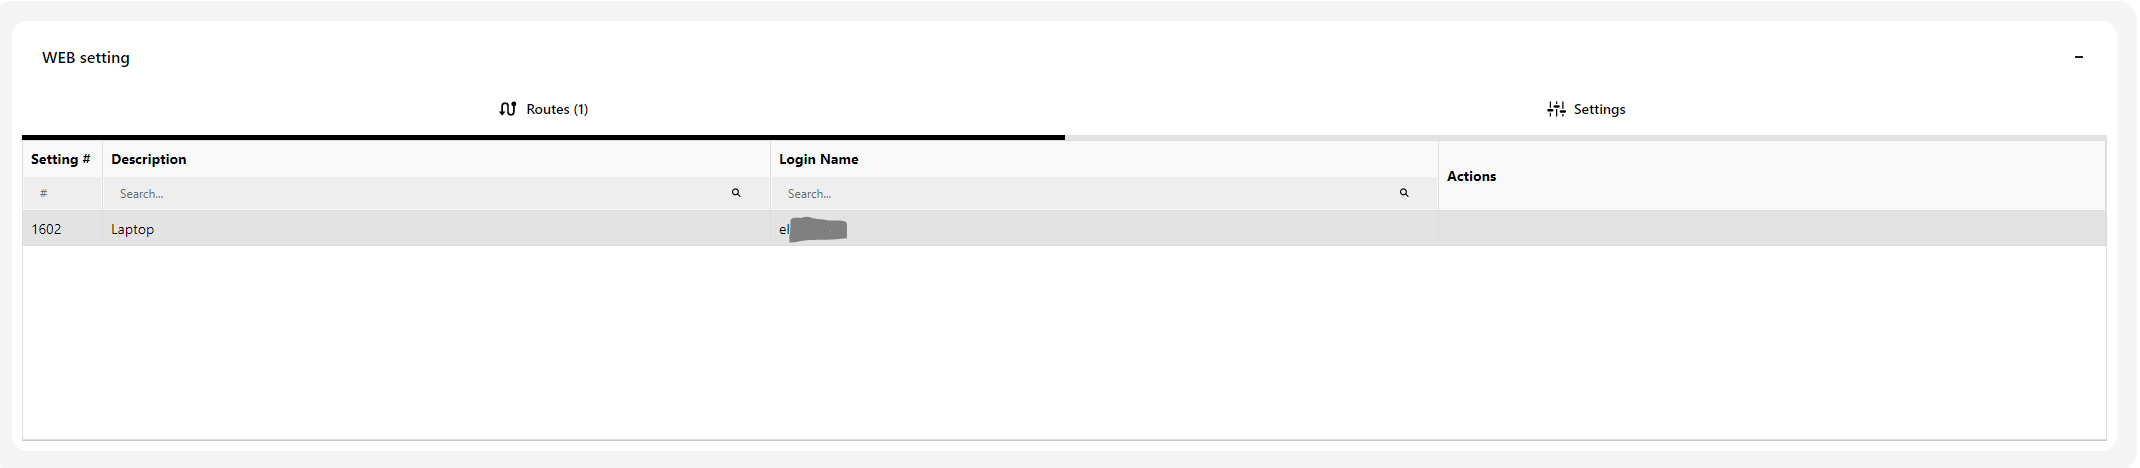
6.1 IP routes
6.2 Settings
6.2.1 General
Various routes are combined in one set. Here you can describe these sets.
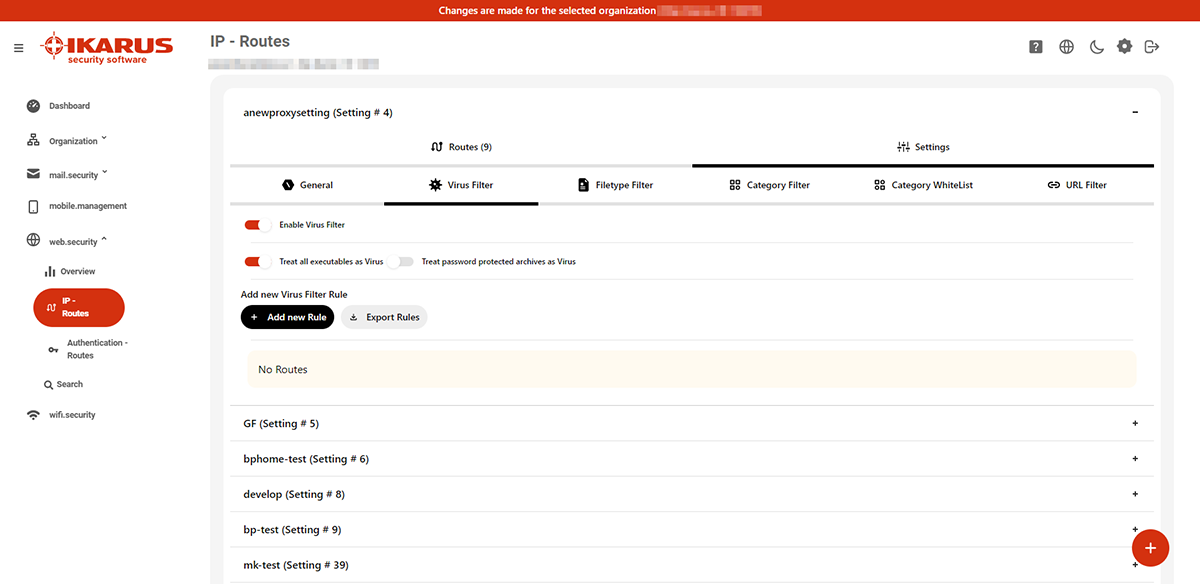
6.2.2 Virus filter
Decide how to react in case of a virus detection and how to deal with password-protected archives. Additionally you can set rules for a whitelist.
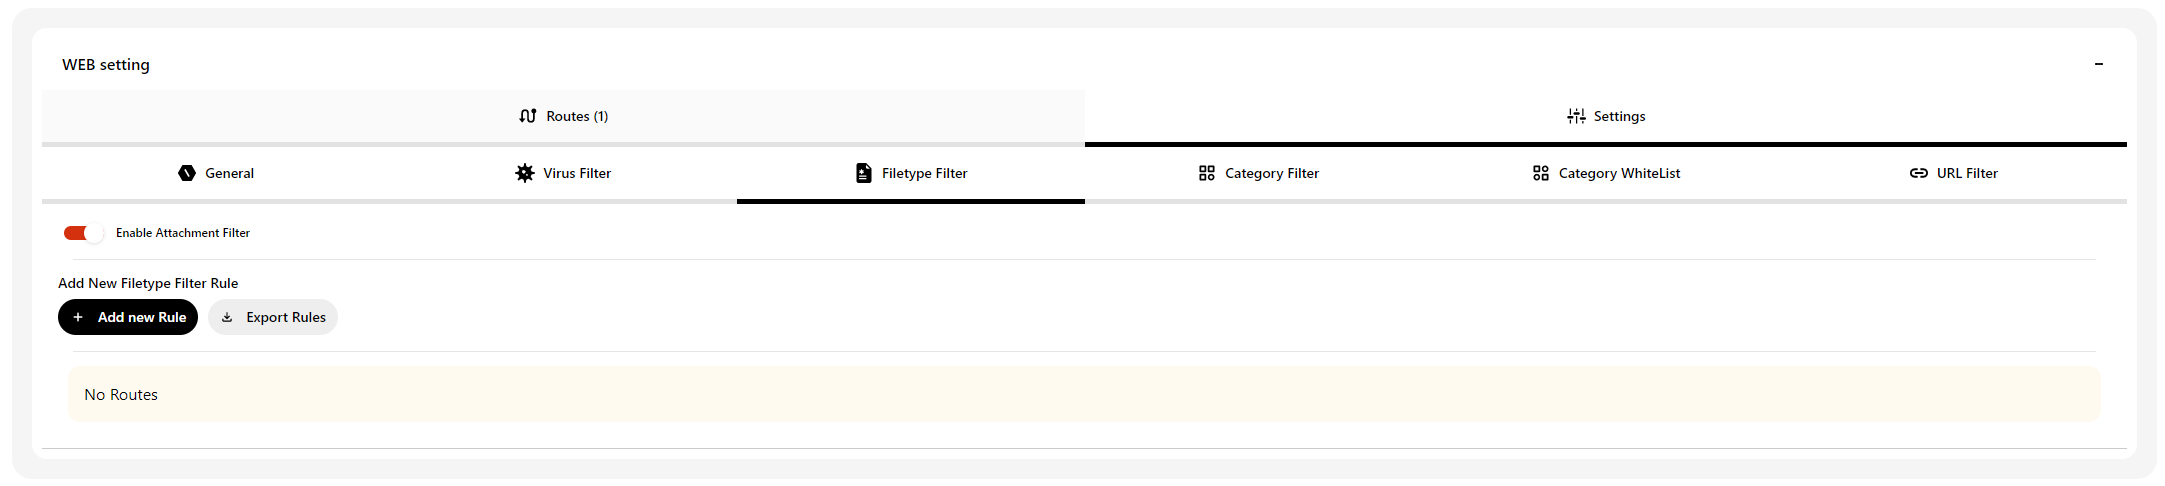
6.2.3 File type filter
Define how to deal with certain file types.
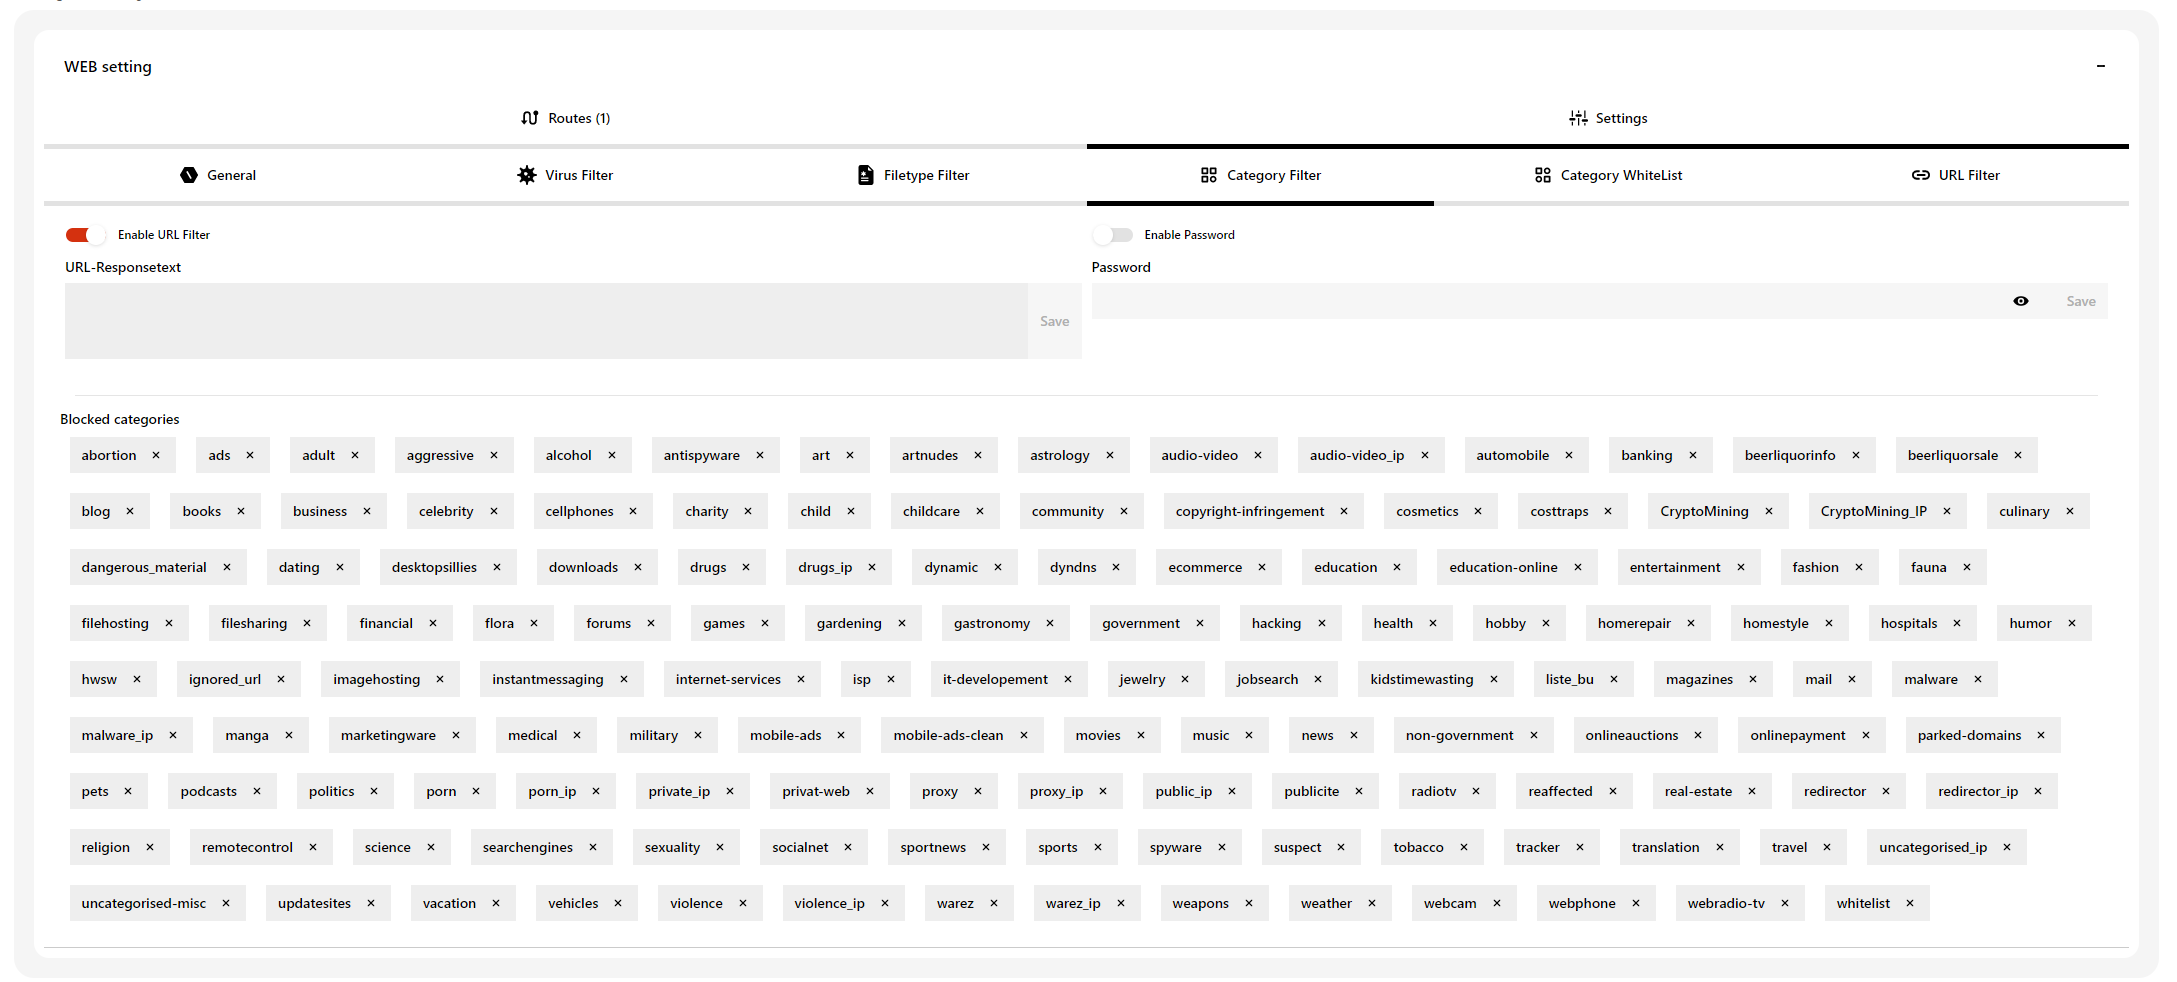
6.2.4 Category filter
Block categories that are defined according to international guidelines.
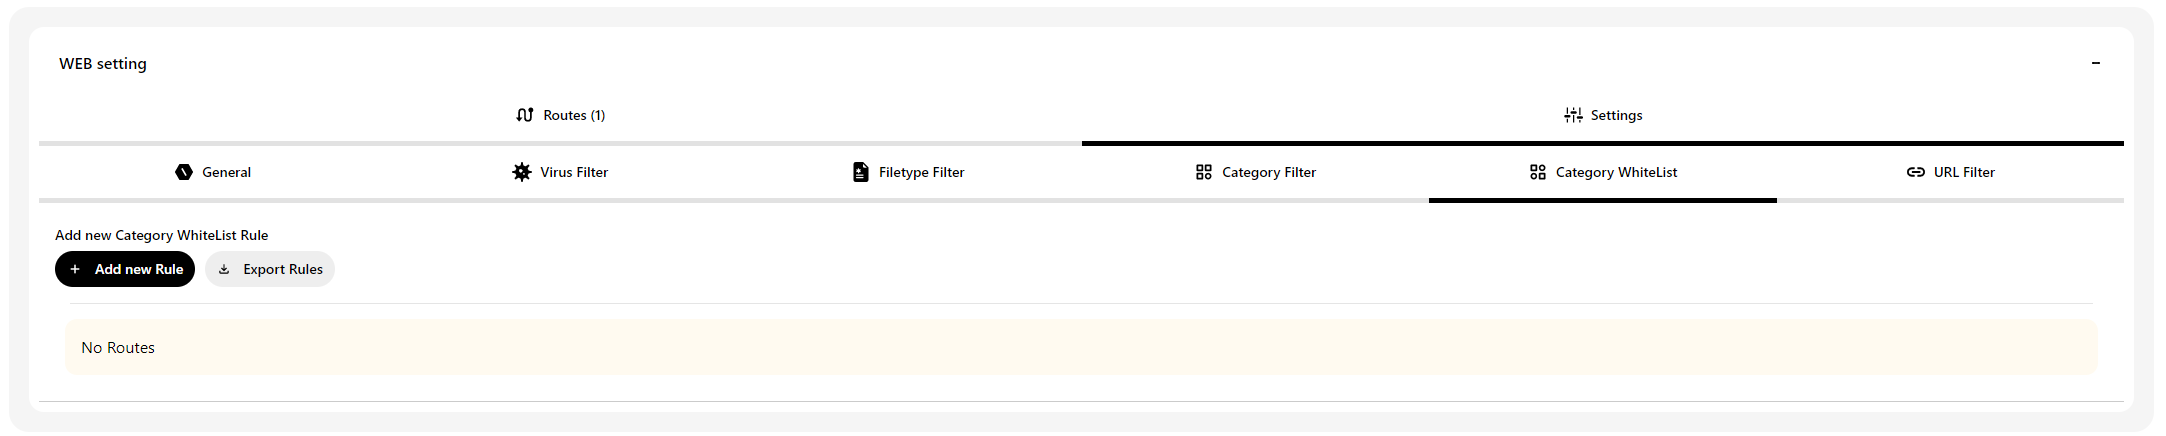
6.2.5 Category whitelist
Allow (“whitelist”) defined categories.
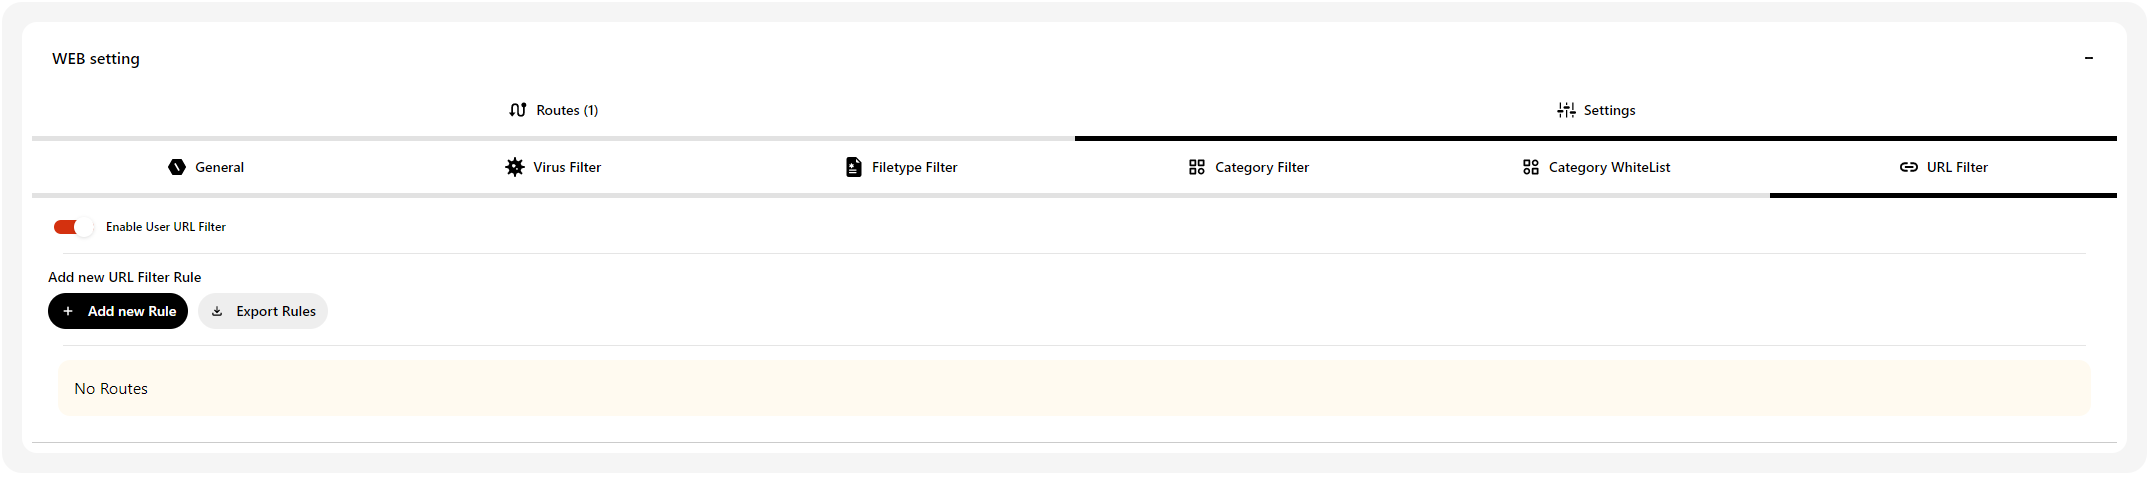
6.2.6 URL filter
Allow or block certain URLs.
6.2.7 Authentication routes
Assign a user name and password for dialling into the proxy service. The setting options correspond to those of the “IP Routes” described above.
7 IKARUS wifi.security
Manage the Wi-Fi routes here. All other setting options are identical to those for IKARUS web.security described above.